Quantcast
Channel: Vegetable Recipes – Panlasang Pinoy
Viewing all 40 articles
Browse latest View live

Panara Recipe

$
0
0

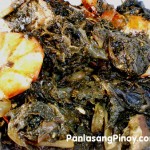
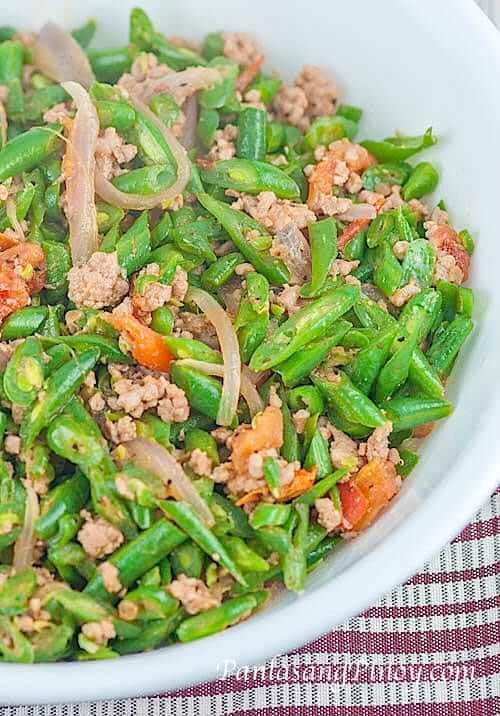
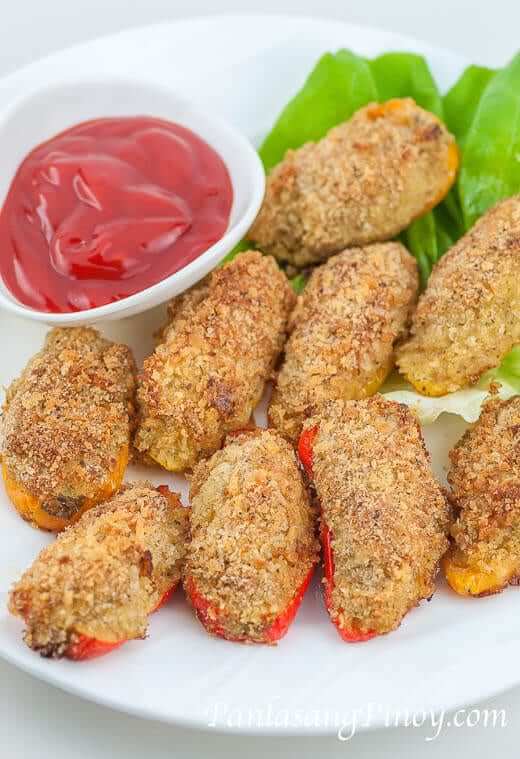
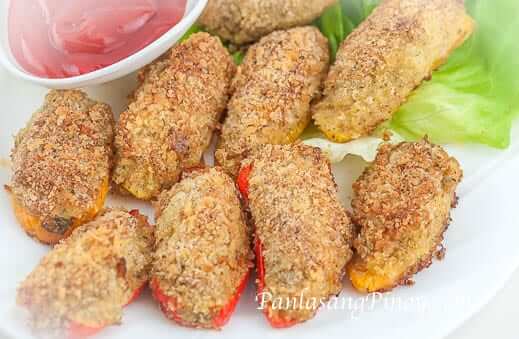
Panara is an appetizer dish made from chopped upo (bottle gourd) and minced shrimp wrapped in a wonton wrapper and deep fried until golden brown. This dish is comparable to pinsec frito and fried siomai.

If my memory serves me right, this dish originated from the Visayas. While this is a perfect appetizer, it can also be eaten for lunch or dinner with rice. I usually dip panara either with spiced vinegar or banana ketchup. This goes well too with toyomansi (ponzu) and sweeet and sour sauce.

Preparing panara is quick and easy. This is one of the top recipes for beginners that I recommend. All you have to do is saute the filling (vegetables and shrimps); seal them in the wonton wrapper; and deep fry until the color turns golden brown. Don’t forget to let excess oil drip by placing newly fried panara in a plate lined with paper towel.

Try this Panara Recipe. Let me know what you think.

Panara Recipe

Panara Recipe

Ingredients

  • 2 cups chopped bottle gourd (upo)
  • 10 pieces medium shrimp (shells and head removed), chopped
  • 1 medium yellow onion, minced
  • 1 teaspoon garlic powder
  • 2 cups cooking oil
  • 15 pieces square wonton wrapper
  • 1 egg, beaten
  • Salt and pepper to taste

Cooking Procedure

  1. Prepare the filling by heating 2 tablespoons of cooking oil in a pan.
  2. Saute the onion. Add the shrimp and cook for 1 minute.
  3. Put-in the chopped upo. Put-in the garlic powder. Stir and cook for 3 to 4 minutes.
  4. Add salt and pepper to taste. Stir.
  5. Transfer to a plate. Let the temperature cool down.
  6. Wrap the mixture in the wonton wrapper. Do this by first lining the sides of the wrapper with beaten egg. Dip your finger into the beaten egg and run it through the side of the wrapper. Scoop about a tablespoon of mixture and place it in the middle of the wrapper. Fold the wrapper such that a triangular shape is formed. Press the sides to seal. Do this procedure until the entire mixture is consumed.
  7. Heat the remaining oil in a cooking pot.
  8. Deep fry the wontons with filings until the color turns medium to golden brown.
  9. Transfer to a serving plate. Serve!
  10. Share and enjoy!

Number of servings (yield): 6

Panlasang Pinoy Cookbook

Download the Free Panlasang Pinoy eCookbook


The post Panara Recipe appeared first on Panlasang Pinoy.


Eggplant and Ground Chicken Omelet

$
0
0

A good way to dress-up your regular Tortang Talong is to make Eggplant and Ground Chicken Omelet. This recipe might sound nice – well this is really nice and delicious, but it can be described as your regular tortang talong cooked with sautéed ground chicken. This adds more protein to your regular fried eggplant meal. I enjoy eating this dish because it is delicious and it makes me feel full longer compared to eating vegetables alone. Eggplant and Ground Chicken Omelet is best eaten with banana ketchup and steamed white rice. I also tried to make a sandwich out of it using whole grain wheat bread and a spread of light mayonnaise — I thought that it was great. Aside from using ground chicken, you can also use ground pork, ground beef, or ground turkey. If you are hesitant to eat fried dishes, you can prepare this dish in a healthier way using the oven. Instead of using too much oil, I use olive oil cooking spray to grease my oven-safe frying pan. I set the oven to broil mode to cook my Eggplant and Ground Chicken Omelet.

Try this Eggplant and Ground Chicken Omelet recipe. Let me know what you think.

Eggplant and ground chicken omelet

Eggplant and Ground Chicken Omelet

Ingredients

  • 2 pieces Chinese eggplant
  • 3 eggs, beaten
  • 1/2 lb. ground chicken
  • 1 medium onion, minced
  • 1/2 teaspoon minced garlic
  • 6 tablespoons cooking oil
  • Salt and pepper to taste

Cooking Procedure

  1. Prepare the eggplants by removing the skin. This can be done by baking the eggplant in 350F for 20 to 25 minutes. Gently peel the skin off after removing the eggplant from the oven and letting the temperature cool down. A quicker way is to burn the skin off by directly exposing the eggplant to fire, but this is not recommended for beginners.
  2. After peeling the skin off the eggplants, arrange both eggplants flat in a wide plate. Using a fork, press the eggplant gently until it spreads-out and forms a paddle-like figure. Set aside.
  3. Heat 2 tablespoons of cooking oil in a sauté pan.
  4. Once the oil becomes hot, sauté the garlic and onion until the onion is soft.
  5. Put-in the ground chicken. Stir fry for 2 to 5 minutes.
  6. Add salt and pepper to taste. Stir, turn off the heat, and set aside.
  7. Meanwhile, heat the remaining 4 tablespoons of cooking oil in a wide frying pan.
  8. Once the oil is hot, quickly dip the eggplant in beaten egg and place it flat on the frying pan to fry.
  9. Scoop about a quarter (1/4) of the cooked ground chicken and arrange it on top of the eggplant. Pour beaten egg on the ground chicken enough to cover everything, do not put too much though as you will still need the egg later.
  10. Scoop some cooking oil from the pan and pour it over the top off the eggplant omelet. This will partially cook the egg on top and prevent the meat from falling apart.
  11. Gently turn-over the eggplant (side with ground chicken facing down). Use a wide spatula to do this. Continue to cook in medium heat for 3 minutes. While doing this, scoop a quarter of cooked ground chicken and arrange it on top of the other side. Pour some egg on top of the ground chicken and scoop some cooking oil on top.
  12. Flip the eggplant and cook the other side for 2 to 3 minutes.
  13. Transfer the eggplant to a serving plate. Serve with rice and banana ketchup.
  14. Share and enjoy!

Number of servings (yield): 2

Panlasang Pinoy Cookbook

Download the Free Panlasang Pinoy eCookbook


The post Eggplant and Ground Chicken Omelet appeared first on Panlasang Pinoy.

Ginataang Langka with Pork Recipe

$
0
0

I enjoyed having Ginataang Langka with Pork for lunch. The combination of flavors was really good and the spice from the chili pepper made it even better. There is no other way to eat this but with warm steamed white rice. I suggest that you control your rice intake because this yummy spicy dish can make you eat without you consciously noticing.

I am thankful that there are canned unripe jackfruits nowadays in the Asian groceries and Filipino stores. Just like canned coconut milk, both of them come-in handy anytime you need them.

ginataang-langka-with-pork-2

Ginataang Langka with Pork is best if the pork is as tender as it can be. Simmering the pork in coconut milk for several minutes can do this. Do not be afraid to add a cup or more of water to the coconut milk if you think that the pork is not tender enough. The water will eventually evaporate and you will still get that thick creamy coconut sauce.

I indicated in the recipe below that the chili pepper is an optional ingredient. Please do not be obliged to add the peppers if you are not able to handle spicy foods. Ginataang Langka with pork will still be delicious even without it.

Try this Ginataang Langka with Pork Recipe. Enjoy!

ginataang-langka-with-pork-1

Ginataang Langka with Pork Recipe

Ingredients

  • 20 oz. unripe jackfruit, chopped
  • 10 oz. pork, cubed
  • 2 cups coconut milk
  • 4 pieces chili pepper, chopped (optional)
  • 1 medium onion, sliced
  • 1 teaspoon minced garlic
  • 1 tablespoon fish sauce
  • 1/4 teaspoon ground black pepper
  • 2 tablespoons cooking oil

Watch the cooking video:

//www.youtube.com/watch?v=Yyn9fQrWxOw

Cooking Procedure

  1. Heat the cooking oil in a pan.
  2. Once the oil becomes hot, sauté the onion and garlic.
  3. Add the pork. Cook until medium brown.
  4. Pour the coconut milk in the pan. Let boil. Cover and simmer for 20 minutes. Add water if needed.
  5. Add the ground black pepper, chili, and fish sauce. Stir.
  6. Add the jackfruit. Stir and cook for 5 to 7 minutes.
  7. Transfer to a serving bowl. Serve.
  8. Share and enjoy!

Number of servings (yield): 3

Panlasang Pinoy Cookbook

Download the Free Panlasang Pinoy eCookbook


The post Ginataang Langka with Pork Recipe appeared first on Panlasang Pinoy.

Sauteed Shrimp with String Beans

$
0
0

Sauteed Shrimp with String Beans or Ginisang Hipon at Sitaw is a quick and easy shrimp with vegetable recipe that you can prepare for lunch. This goes well with steamed white rice. I enjoy this dish with a little fish sauce or patis on the side and sometimes with bagoong alamang (shrimp paste) too.

I like to cook Sauteed Shrimp with String Beans when I am always in a hurry and if I have fresh string beans around. This recipe will guide you on how to cook shrimp and make this delicious dish in less than 20 minutes. I make sure that I have shrimp sitting in the freezer so that I can easily defrost it when needed.

Just like any other Filipino Recipes or Filipino Food that requires sauteing, we will need garlic and onion. In addition, we will need a piece of ripe plum tomato for this Sauteed Shrimp with String Beans recipe. All you need to do is sauté the onion, garlic, and tomato then add the shrimp and vegetables along with the seasonings – yummy.

Try this Sauteed Shrimp with String Beans Recipe.

Sauteed Shrimp with String Beans

Sauteed Shrimp with String Beans

Ingredients

  • 1 lb. shrimp, deveined
  • 1 bunch string beans (about 4 cups), sliced in length of 2 inches
  • 1 medium yellow onion, sliced
  • 1 medium ripe tomato, chopped
  • 4 cloves garlic, crushed and chopped
  •  2 tablespoons soy sauce
  • 3 tablespoons canola oil
  • Salt and pepper to taste

Cooking Procedure

  1. Heat the oil in a pan.
  2. Saute the onion, tomato, and garlic.
  3. Sprinkle a dash of ground black pepper.
  4. Once the onion turns soft, put-in the shrimp and stir fry for 2 to 3 minutes.
  5. Add the string beans and soy sauce. Continue to stir fry for 5 minutes.
  6. Add salt and pepper to taste.
  7. Serve. Share and enjoy!

Number of servings (yield): 4

Panlasang Pinoy Cookbook

Download the Free Panlasang Pinoy eCookbook


The post Sauteed Shrimp with String Beans appeared first on Panlasang Pinoy.

Cream of Asparagus Soup

$
0
0

Cream of Asparagus Soup makes a rich and delicious appetizer. It has a nice thick texture and full of good flavor that will satisfy your taste buds. Aside from having theses positive qualities, Cream of Asparagus Soup is also easy to prepare and takes just a fraction of your time.

The trick in making the perfect Cream of Asparagus Soup is in the blender that you will use. You see, we need to blend the ingredients while we are cooking to achieve a smooth and thick texture. I always use an Immersion Blender for this job, and it never fails me. I also use the same blender to prepare smoothies and shake because it is convenient and easy to wash, compared to traditional blenders.

This Cream of Asparagus Soup is perfect for a light lunch or an appetizer for any kind of main dish. I love to have it with a few crackers on the side.

Try this Cream of Asparagus Soup Recipe. Enjoy!

Cream of Asparagus Soup

Cream of Asparagus Soup

Ingredients

  • 1 bunch (about a pound) fresh asparagus, lower end trimmed and then chopped
  • 1 medium yellow onion, minced
  • 2 tablespoons cooking oil
  • 1/2 teaspoon minced garlic
  • 1 cup heavy cream
  • 2 cups chicken broth
  • 1 cup water
  • salt and pepper to taste

Cooking Procedure

  1. Heat the cooking oil in a cooking pot.
  2. Saute the onion, asparagus, and garlic for 5 minutes.
  3. Pour-in water and chicken broth. Bring to a boil. cover and simmer for 15 minutes.
  4. Add the heavy cream.
  5. Start to refine the mixture using an immersion blender. Note: make sure that you take extra caution while blending the mixture.
  6. Once the mixture is smooth and creamy, add salt and pepper to taste.Stir.
  7. Tranfer to a serving bowl.
  8. Serve. Share and enjoy!

Number of servings (yield): 4

Panlasang Pinoy Cookbook

Download the Free Panlasang Pinoy eCookbook


The post Cream of Asparagus Soup appeared first on Panlasang Pinoy.

Broccoli Bacon Salad Recipe

$
0
0

Broccoli Bacon Salad is a perfect salad recipe for bacon lovers out there that want to enjoy crisp and tasty broccoli with their beloved bacon. I think that I am describing myself here, unless there are some of you who loves bacon and want to make healthy salads with it once in a while.

There is not much cooking involve when you make broccoli bacon salad. The only cooking will probably be with the bacon, and our task is to make the bacon crisp. Do not worry because I indicated a link below pointing to one of our post on how to cook bacon. You can use this as a guide.

broccoli bacon salad

Once the bacon is cooked, Broccoli Bacon Salad can easily be made by making the salad dressing and combining all the ingredients together. I’m sure that all of you won’t have a hard time doing that. As you know we always try our best to present the recipes as simple as possible so that even beginners can follow.

If you want to cut back on mayonnaise, which is one of the ingredients of Broccoli Bacon Salad, try to use light sour cream as an alternative ingredient.

Try this Broccoli Bacon Salad Recipe; have fun!


Broccoli Bacon Salad Recipe
 
Author: 
Nutrition Information
  • Serves: 3
  • Serving size: 3
Prep time: 
Cook time: 
Total time: 
Ingredients
  • 6 bacon slices, cooked
  • 1 head broccoli, florets chopped
  • 1 cup shredded monterrey jack cheese
  • ½ small sweet onion, minced
  • 2 tablespoons rice vinegar or white wine vinegar
  • 1 tablespoons granulated white sugar
  • ¼ teaspoon ground black pepper
  • ¼ teaspoon salt
  • ½ cup mayonnaise
  • ¾ cup roasted cashews
Instructions
  1. Prepare the dressing by combining the vinegar, mayonnaise, sugar, pepper, and salt in a bowl. Mix well.
  2. Add the minced onion and stir.
  3. Combine the broccoli and the dressing. Gently toss.
  4. Crumble the bacon and add to the bowl with broccoli. Add the cashew and cheese, as well. Continue to toss gently until all the ingredients are well belended.
  5. Transfer to a serving bowl. Serve.
  6. Share and enjoy


Panlasang Pinoy Cookbook

Download the Free Panlasang Pinoy eCookbook


The post Broccoli Bacon Salad Recipe appeared first on Panlasang Pinoy.

Monggo Guisado Recipe

$
0
0

Monggo Guisado is another version of Ginisang Monggo; this time using fish flakes from left over fried fish. I think that I cooked more than enough fried galunggong the previous day and I don’t want it to go to waste. My solution was to make this simple and delicious monggo guisado. I can also make fish lumpia, but that will be in a future post.

Making monggo guisado is easy. Since I am using mung beans that were soaked in water for several hours, I saved a lot of cooking time. The mung beans absorbed the water while soaking over night, this helped soften its texture. You will know because you can easily crush a bean using your fingers – try that using hard mung beans and you’ll immediately see the difference.

Monggo Guisado

I also remembered that I still have half a bottle full of bagoong isda (bagoong Balayan to be exact). I usually mix this with calamansi or lemon and use it as a dipping sauce for fried fish. I wanted to leverage on the flavor and richness of this condiment; I knew that adding this with the mung beans would help improve the taste of the entire dish.

Who says that you cannot have Monggo Guisado if it’s not a Friday? You can now enjoy monggo any day you like.

Try this Monggo Guisado Recipe. Enjoy!

Monggo Guisado Recipe
 
Author: 
Nutrition Information
  • Serves: 4
  • Serving size: 4
Cuisine: Filipino Recipe
Prep time: 
Cook time: 
Total time: 
Ingredients
  • 1¼ cup mung beans, soaked in 1½ cups water (overnight)
  • ¾ cups fish flakes
  • 1 bunch fresh spinach
  • 2 tablespoons bagoong isda
  • 1 small yellow onion
  • 1 cup diced tomatoes (canned) or 3 fresh plum tomatoes, cubed
  • 1 tablespoon minced garlic
  • 2 cups water
  • ground black pepper to taste
  • 2 tablespoons cooking oil
Instructions
  1. Heat the cooking oil in a pan.
  2. Saute the onion and garlic.
  3. Once the onion becomes soft, add the fish flakes and continue to cook in medium heat for 1 to 2 minutes.
  4. Add the tomatoes. Stir and cook for 1 minute.
  5. Put-in the mung beans. Stir, add the bagoong isda, and 1 cup water. Cover and cook for 15 to 18 minutes. Add more water if necessary.
  6. Sprinkle some ground black pepper and then add the spinach. Stir.
  7. Add more water (around 1 cup or more as needed). Let boil and cook for 5 minutes more.
  8. Adjust the taste by adding more bagoong isda (only of needed).
  9. Transfer to a serving bowl. Serve.
  10. Serve and enjoy!


Watch the cooking video:

//www.youtube.com/watch?v=4QbSN8TNQUk

Panlasang Pinoy Cookbook

Download the Free Panlasang Pinoy eCookbook


The post Monggo Guisado Recipe appeared first on Panlasang Pinoy.

Sipo Eggs Recipe

$
0
0

Have you had Sipo Eggs? If you have not, then now is the best time to know more about Sipo Eggs and learn how to cook it at the comfort of your own home. Sipo Egg is a Filipino quail egg and shrimp recipe that originated in Pampanga. This dish has a rich thick sauce and is also composed of vegetables such as carrots and green peas.

Sipo Eggs is served during special occasions. This is something that can be completed quickly and easily. This Sipo Egg Recipe that we have for you is one of the simple and quick variations. You can make this version more festive by adding minced ham or luncheon meat.

In the video, you will hear me saying that I am using fresh carrots for this recipe. It takes quite a while to peel and chop the carrots — so if you are pressed for time, you can use frozen mixed vegetables. You will safe time and have more veggies than what we have in this recipe, which I think is more exciting.

Sipo Eggs

I recommend using fresh quail eggs over the quail eggs in cans. It is obvious that fresh eggs tastes better and is more pleasant to eat. When boiling quail eggs, first boil the water then add the eggs piece by piece. Let it boil for 3 ½ minutes. Turn the heat off and leave the eggs in the warm water until the temperature cools down a bit. Easy, isn’t it?

Now its your turn to try this rich Sipo Eggs Recipe. Enjoy!

Sipo Eggs Recipe
 
Author: 
Nutrition Information
  • Serves: 6
  • Serving size: 6
Prep time: 
Cook time: 
Total time: 
Ingredients
  • 1 lb. large shrimp, head and shell removed and deveiened
  • 20 pieces boiled quail eggs
  • 1 small yellow onion minced
  • 1 teaspoon minced garlic
  • ¼ cup butter
  • 1 tablespoon cooking oil
  • 1½ cups frozen green peas
  • 1 medium carrot, cubed
  • ¾ cup water
  • 4 ounces ham, minced (optional)
  • 1 can (10 oz.) cream of mushroom
  • ¾ cup water chestnut or singkamas, cubed
  • ½ cup table cream or heavy whipping cream
  • Salt and pepper to taste
Instructions
  1. Melt the butter in a cooking pan.
  2. Add the cooking oil.
  3. Once the mixture becomes hot, saute the shrimp for a minute per side.
  4. Remove the shrimp and set aside.
  5. Meanwhile, saute the onion and garlic.
  6. Put-in the carrot and green peas. Add the ham (this is an optional ingredient).Cook for 3 minutes.
  7. Pour-in the water (I used water with shrimp juice in the video).Let it boil. Cook for 1 minute.
  8. Add the quail eggs and shrimp.Stir.
  9. Pour-in the cream of mushroom and table cream. Stir once more until the ingredients are well distributed.
  10. Add water chestnuts, salt and pepper.
  11. Transfer to a serving bowl.
  12. Serve. Share and enjoy!


Watch the cooking video:

//www.youtube.com/watch?v=NbuywMxajuk

Panlasang Pinoy Cookbook

Download the Free Panlasang Pinoy eCookbook


The post Sipo Eggs Recipe appeared first on Panlasang Pinoy.


Kalabasa Soup with Ampalaya Leaves

$
0
0

It is the time of year wherein pumpkin gets a lot of attention. This time, we will not make the traditional pumpkin soup. Instead, I will show you how to cook a very simple soup using butternut squash with a Filipino twist — I call this Kalabasa Soup with Ampalaya Leaves.

Kalabasa Soup

You can easily guess what’s in this soup that we are making by its name. I chose butternut squash because it has a mild sweet taste. It will work well to balance the flavor of the soup especially when the bitter melon leaves are added. The bitter melon (ampalaya) leaves has a purpose in this recipe. It actually makes the soup taste better and it provides additional nutrients.

Kalabasa Soup pairs well with fried fish and rice. I think that it is best eaten on a rainy day to make your meal more enjoyable and appetizing. I am not sure if its just me, but do you also think or crave for warm soup or porridge and fried fish on a rainy day? I sometimes crave for Champorado and tuyo when it starts to rain.

Try this Kalabasa Soup with Ampalaya Leaves recipe.

Kalabasa Soup with Ampalaya Leaves
 
Author: 
Nutrition Information
  • Serves: 5
  • Serving size: 5
Prep time: 
Cook time: 
Total time: 
Ingredients
  • ½ medium butternut squash; peeled, seeds removed, and cubed
  • 3 cups chicken broth
  • 3 cups water
  • A bunch of Ampalaya (bitter melon) leaves
  • 1 medium yellow onion, sliced
  • ½ teaspoon garlic powder
  • Salt to taste
Instructions
  1. Combine chicken broth and water in a cooking pot. Bring to a boil.
  2. Add the onion and butternut squash. Boil for 20 minutes.
  3. Put-in the garlic powder. Stir
  4. Put-in the ampalaya leaves. Cook for 5 minutes.
  5. Add salt to taste. Serve.
  6. Share and enjoy!


Panlasang Pinoy Cookbook

Download the Free Panlasang Pinoy eCookbook


The post Kalabasa Soup with Ampalaya Leaves appeared first on Panlasang Pinoy.

Sauteed Bok Choy with Shrimp

$
0
0

Sauteed Bok Choy with Shrimp is a simple recipe that involves baby bok choy. This vegetable is somewhat similar to a vegetable known as pechay in the Philippines – thus this dish can be considered as a variation of ginisang pechay.

Sauteed Bok Choy with Shrimp

Sauteed Bok Choy with Shrimp is quick to make. This is one of the reasons why I always make it when the ingredients are available in my fridge. I think that the sherry or cooking wine helps the dis taste better.

A few notes before you start cooking Sauteed Bok Choy with Shrimp; make sure that the bok choy leaves are separated from each other. Do this by slicing the lower end of the bok choy crosswise. This will set the leaves apart. Also, use medium shrimp for this recipe. It might be more convenient if you buy frozen packaged shrimp from the grocery. It will save you time cleaning and removing the shell from the shrimp.

Try this Sauteed Bok Choy with Shrimp recipe. Enjoy!

Sauteed Bok Choy with Shrimp
 
Author: 
Nutrition Information
  • Serves: 4
  • Serving size: 4
Prep time: 
Cook time: 
Total time: 
Ingredients
  • 20 pieces medium shrimp, deveined
  • 5 bunches baby bok choy
  • 1 medium plum tomato, diced
  • 1 teaspoon minced garlic
  • 1 medium yellow onion, sliced
  • 3 tablespoons, sherry or cooking wine
  • Salt and pepper to taste
  • 2 tablespoons cooking oil
Instructions
  1. Heat the oil in a pan.
  2. Saute the garlic and onions.Continue to cook until the onions are caramelized.
  3. Add the tomato. Cook until soft.
  4. Put-in the shrimp and cooking wine. Cook for 5 minutes.
  5. Add the bok choy. Stir. Cover and cook for 3 to 5 minutes.
  6. Add salt and pepper to taste.
  7. Transfer to a serving plate.
  8. Serve. Share and enjoy!


Panlasang Pinoy Cookbook

Download the Free Panlasang Pinoy eCookbook


The post Sauteed Bok Choy with Shrimp appeared first on Panlasang Pinoy.

Ginisang Papaya

$
0
0

Ginisang Papaya is a delicious and easy to prepare dish that you can make for lunch or dinner. This dish is similar to ginisang upo or ginisang sayote – although the meat used might vary.

Ginisang Papaya

I like the taste of cooked papaya, be it cooked with coconut milk (ginataang papaya), sautéed (ginisa), or cooked with chicken and ginger broth (tinola). Of course, nothing beats atcharang papaya as an appetizer as far as I am concerned.

As I mentioned in the video, you can use salt as an alternative to fish sauce. I understand that not all people like fish sauce, so please try to substitute ingredients as you please. If you want to use pork, chicken or beef instead of shrimp, try adding it before the papaya and give it at least 8 minutes to cook.

Try this Ginisang Papaya recipe. Enjoy!

Ginisang Papaya
 
Author: 
Nutrition Information
  • Serves: 4
  • Serving size: 4
Prep time: 
Cook time: 
Total time: 
Ingredients
  • 1 small unripe papaya, sliced
  • 1 cup malunggay leaves
  • 4 ounces shrimp, shell and head removed
  • 2 tablespoons chopped parsley
  • 1 small white onion, sliced
  • 4 cloves garlic, crushed and chopped
  • 2 tablespoons fish sauce
  • ⅛ teaspoon ground black pepper
  • 3 tablespoons cooking oil
Instructions
  1. Heat the cooking oil in a pan.
  2. Saute the garlic and onion.
  3. Once the onion becomes soft, add the parsley and papaya. Continue to sauté for 3 minutes. Cover and cook in medium heat for another 3 to 5 minutes.
  4. Remove the cover. Add the shrimp. Stir. Cook for 1 to 2 minutes.
  5. Add the malunggay leaves. Stir and cook for 3 minutes.
  6. Pour-in the fish sauce and add the ground black pepper. Stir.
  7. Transfer to a serving plate. Serve.
  8. Share and enjoy!


Watch the cooking video:

//www.youtube.com/watch?v=F59-oSp06z8

Panlasang Pinoy Cookbook

Download the Free Panlasang Pinoy eCookbook

Laing Recipe

$
0
0

Here is an awesome Filipino Laing Recipe just for you. Laing is a Filipino dish composed of dried taro leaves and coconut milk. It was first introduced in the province of Bicol. This dish has been very famous — it is popular within the Philippines and also outside of the country. Since the purpose of this blog is to raise awareness about Filipino Food and Recipes, I hope that this awesome dish will soon get the international credit that it deserves.

Laing Recipe

Preparing this Laing Recipe is simple and easy. As I mentioned in the video (see the video below), we do not need to sauté or use any cooking oil. simply combine the initial ingredients with the coconut milk and boil until the meat gets tender. When you add the dried taro leaves, make sure that you not stir right away. Let the leaves absorb the liquid. you will know that enough liquid is absorbed because the leaves will slowly sink and the color will be a bit darker.

We are not using any seasonings in the recipe — all we have is bagoong or balaw (shrimp paste) to add extra flavor. Aside from the taro leaves, which is the most important ingredient along with the coconut milk, I used pork for this recipe. If you want to add shrimp, feel free to do so but try to add it towards the end — so that it won’t get overcooked.

Laing

Laing is best served with warm steamed rice. I also think that left over laing tastes better. What I usually do is cook laing a day before consumption. I place it in a big jar and put it in the fridge overnight. Simply transfer it in a pan or you can also microwave it to reheat before eating.

Try this Laing Recipe. Cheers!

Laing Recipe
 
Author: 
Nutrition Information
  • Serves: 8
  • Serving size: 8
Prep time: 
Cook time: 
Total time: 
Ingredients
  • 1 pack (3.5 oz or 100g) dried taro leaves
  • 6 cups (3 cans) coconut milk
  • 2 cups (1 can) coconut cream
  • ½ cup shrimp paste (bagoong or balaw)
  • ½ lb. pork shoulder, thinly sliced
  • 5 to 7 pieces red chilies
  • 1 medium yellow onion, sliced
  • ½ cup sliced ginger
  • 8 cloves garlic, crushed
Instructions
  1. Combine the coconut milk, pork, ginger, shrimp paste, ginger, onion, and garlic in a cooking pot. Heat the pot and let it boil.
  2. Once the mixture starts to boil, gently stir to mix the ingredients. Cover the pot and simmer for 15 to 20 minutes. Make sure to stir once in a while to prevent the ingredients from sticking at the bottom of the cooking pot.
  3. Add the dried taro leaves. Do not stir. Let it stay until the leaves absorb the coconut milk. This takes about 20 to 30 minutes. you can gently push the leaves down so that it can absorb more coconut milk.
  4. Once the leaves absorb the coconut milk, stir the leaves and then continue to cook for to 10 minutes.
  5. Pour the coconut cream in the cooking pot. Add the red chilies. Stir. Cook for 10 to 12 minutes more.
  6. Transfer to a serving plate. Serve.
  7. Share and enjoy!


Watch the cooking video:

//www.youtube.com/watch?v=0Ai43wjdKuU

Panlasang Pinoy Cookbook

Download the Free Panlasang Pinoy eCookbook

The post Laing Recipe appeared first on Panlasang Pinoy.

Ginisang Baguio Beans with Pork

$
0
0

Ginisang Baguio Beans with Pork is a simple dish consisting of fresh green beans, tomato, and ground pork. Green beans are known as Baguio beans in the Philippines; this has something to do with the place where green beans are commonly grown.

Ginisang Baguio Beans with Pork

Ginisang Baguio beans means Sauteed Greens Beans with the addition of ground pork. It is a quick and easy recipe that produces a delicous result. This dish is often eaten with plain white rice and probably some fish sauce as a condiment.

I like having Sauteed beans with fried fish. It will be great if I have fried tilapia or fried pompano. Fried fish adobo (galunggong) will also work with Ginisang Baguio Beans with Pork along with a cup of extra rice – more likely.

Ginisang Baguio Beans with Pork Recipe

Try this simple yet satisfying Ginisang Baguio Beans with Pork recipe. Enjoy!

Ginisang Baguio Beans with Pork
 
Author: 
Nutrition Information
  • Serves: 4
  • Serving size: 4
Prep time: 
Cook time: 
Total time: 
Ingredients
  • 1 lb. long green beans (Baguio beans), sliced diagonally
  • ½ lb. ground pork
  • 1 medium onion, sliced
  • 1 teaspoon minced garlic
  • 1 medium plum tomato, diced
  • 1½ tablespoons fish sauce
  • ¼ teaspoon ground black pepper
  • 2 tablespoons cooking oil
Instructions
  1. Heat the oil in a pan.
  2. Saute the onion, garlic, and tomato.
  3. Add the ground pork when the tomato becomes soft. Continue to saute until the pork turns light to medium brown. Make sure that the pork is fully cooked.
  4. Add the fish sauce and ground black pepper. Stir.
  5. Put-in the sliced beans. Toss and continue to saute for 5 minutes.
  6. Transfer to a serving plate. Serve.
  7. Share and enjoy!


Watch the cooking video:

Panlasang Pinoy Cookbook

Download the Free Panlasang Pinoy eCookbook

The post Ginisang Baguio Beans with Pork appeared first on Panlasang Pinoy.

Kangkong in Oyster Sauce Recipe

$
0
0

Kangkong in Oyster Sauce is a simple vegetable dish composed of a green leafy vegetable that is locally known in the Philippines as kangkong, oyster sauce, and some seasonings. Kangkong is also called water spinach. The Chinese variety is known as ongchoy. This variety is easier to find here in North America — mostly in Asian groceries or Filipino stores.

Kangkong with Oyster Sauce Recipe

This Kangkong in Oyster Sauce Recipe is so quick and easy. You will have your healthy vegetable dish ready in a matter of a few minutes. This is considered as a side dish that can be eaten with rice and main dishes such as sweet and sour pork, orange chicken, or kung-pao chicken. I also like to have this with kung-pao shrimp and char-siu (pork barbeque).

Kangkong with Oyster Sauce_

Kangkong is not only limited to sinigang dishes, this dish is a good example on how to prepare this simple vegetable. Also try to make Kangkong with bagoong (shrimp paste) and Adobong Kangkong next time.

Try this Kangkong in Oyster Sauce Recipe. Enjoy!

Kangkong in Oyster Sauce Recipe
 
Author: 
Nutrition Information
  • Serves: 3
  • Serving size: 3
Prep time: 
Cook time: 
Total time: 
Ingredients
  • 1 bunch kangkong (Ongchoy or water spinach), cleaned
  • 3 tablespoons oyster sauce
  • 3 tablespoons toasted garlic
  • ¾ cup beef broth
  • ½ teaspoon cornstarch
  • Salt and ground black pepper to taste
  • ¼ teaspoon red pepper flakes (optional)
  • 1 teaspoon toasted sesame seeds (optional)
  • 2 tablespoons cooking oil
Instructions
  1. Separated the kangkong leaves from the stalk. Cut the stalk into 2 inch length pieces. Set aside.
  2. Prepare the toasted garlic by following this guide: How to make toasted garlic. Set aside.
  3. In a bowl, combine beef broth, oyster sauce, and corn starch. Mix well.
  4. Heat 2 tablespoons of cooking oil (preferably the one used to make toasted garlic) in a pan.
  5. When the oil gets hot, put-in the sliced kangkong stalks. Cook for 2 minutes.
  6. Pour-in the oyster sauce, beef broth, and cornstarch mixture. Add the toasted garlic. Stir. Cook for 1 minute of until the sauce starts to thicken.
  7. Add the kangkong leaves and red pepper flakes. Let it cook for 1 to 2 minutes.
  8. Sprinkle salt and ground black pepper to taste.
  9. Transfer to a serving bowl. Sprinkle sesame seeds on top.
  10. Share and enjoy!


Panlasang Pinoy Cookbook

Download the Free Panlasang Pinoy eCookbook

The post Kangkong in Oyster Sauce Recipe appeared first on Panlasang Pinoy.

Monggo with Tuyo Recipe (Mung Beans with Salted Fish)

$
0
0

Have you tried bottled tuyo? This might be new to some of you. I knew about this only a few months ago – when I was craving for tuyo (and it is winter here), but I did not want the smell to linger inside the house. I discovered it when I was getting some bottled Spanish bangus sardines from the Asian store. I think that it is also called gourmet tuyo.

monggo with tuyo recipe

Here is my Instagram post about bottled tuyo:

Missing Pinas bigtime. Thanks to bottled tuyo, I can enjoy you without the odor. #panlasangpinoy

A photo posted by Panlasang Pinoy (@panlasangpinoy) on


I tried to use this ingredient to make Monggo. I think that using bottled tuyo for this Monggo with tuyo recipe is just perfect because the fish has the right amount of saltiness and the fish can be eaten with the bones. Yes, you read it correctly – the fish is soft enough to the point that it can be eaten without segregating the meat from the bones.

monggo with tuyo

Some of you might be tempted to try this recipe using regular tuyo (not in a bottle). If this is the case, I recommend that you first fry the tuyo, remove the head, scales, and fish bones before you make this recipe. You deserve to enjoy this dish without any issues after all.
I added malunggay leaves to complete this dish. You can also put-in spinach, saluyot, or even alugbati. Enjoy this with warm rice.

Aside from making Monggo with tuyo, you can also prepare the following dishes with any type of tuyo:


Try this Monggo with tuyo Recipe. Don’t forget to control your rice intake.

Monggo with Tuyo Recipe (Mung Beans with Salted Fish)
 
Author: 
Nutrition Information
  • Serves: 5
  • Serving size: 5
Prep time: 
Cook time: 
Total time: 
Ingredients
  • 2 cups mung beans (monggo)
  • 6 pieces bottled tuyo (or fried tuyo, head removed)
  • 2 cups malunggay leaves
  • 2 to 3 tablespoons fish sauce (patis)
  • 1 tablespoon garlic, minced
  • 5 cups water
  • Ground black pepper to taste
  • 1 medium yellow onion, sliced
  • 2 medium plum tomatoes, diced
  • 3 tablespoons cooking oil
Instructions
  1. Pour 5 cups of water in a cooking pot. Let boil.
  2. Put-in the mung beans. Cover and cook in low to medium heat until the mung beans completely absorb the water. Add more water if needed. Set aside.
  3. Heat the oil in a large cooking pot.
  4. Sauté the onion, tomato, and garlic
  5. Once the onion gets soft, add the salted fish (tuyo). Cook for 1 minute.
  6. Add the cooked mung beans. Stir.
  7. Put-in the malunggay leaves, fish sauce, and 1 cup water. Stir and cook uncovered for 3 to 7 minutes or until the desired consistency is achieved. You can add more water if needed.
  8. Sprinkle some ground black pepper to taste.
  9. Transfer to a serving bowl. Serve.
  10. Share and enjoy!


Panlasang Pinoy Cookbook

Download the Free Panlasang Pinoy eCookbook

The post Monggo with Tuyo Recipe (Mung Beans with Salted Fish) appeared first on Panlasang Pinoy.


Pork Chop Suey Recipe

$
0
0

Chop Suey is a delicious dish composed of different kinds of vegetables and meat. If you are Filipino (or if your spouse is), you might have an idea on what this dish is all about. I first thought that Chop Suey is an authentic Chinese dish, but I learned that it was Chinese-American in nature. Regardless of where it came from, it is has been very popular with Filipinos.

Pork Chop Suey

I got acquainted with Chop Suey since I was a child. It has been a dish that my family enjoys. The version that I grew up eating is the one that uses chicken (and chicken liver) and I already featured the recipe when I was starting this food blog. Click here to see the recipe.

Pork Chop Suey is one of the simplest version that I make, as far as I am concerned because it does not require too many ingredients and it only takes around 30 minutes to make. I enjoy eating this with warm white rice.

Do you like Chop Suey? How do you usually prepare yours? I really would love to hear from you. It will be great if you can also share some tips by commenting below.

Try this simple Pork Chop Suey Recipe. Let me know what you think.


Pork Chop Suey Recipe
 
Author: 
Nutrition Information
  • Serves: 4
  • Serving size: 4
Prep time: 
Cook time: 
Total time: 
Ingredients
  • 1 lb. pork shoulder, sliced into thin strips
  • 1 medium carrot, peeled and sliced crosswise
  • 1 head small cabbage, chopped
  • ¼ cup flat leaf parsley, chopped
  • 1 medium sweet onion, sliced
  • 1 teaspoon minced garlic
  • 1 tablespoon cornstarch diluted in ½ cup beef broth or water
  • 2 tablespoons cooking oil
  • 1 small bell pepper, sliced into strips (any color)
  • 1 tablespoon soy sauce (optional)
  • Salt and ground black pepper to taste
Instructions
  1. Heat a cooking pot and pour-in the cooking oil.
  2. Saute the onion and garlic.
  3. Add the pork and continue to sauté for 5 to7 minutes.
  4. Add the parsley and soy sauce. Put-in the carrot and then cook for 3 to 5 minutes more.
  5. Add the bell pepper and cabbage. Stir-fry for 3 minutes. Cover the cooking pot and continue to cook in medium heat for 8 minutes while stirring every 2 minutes.
  6. Pour-in the diluted cornstarch. Stir and cook until the texture of the dish thickens.
  7. Add salt and pepper to taste.
  8. Transfer to a serving plate. Serve.
  9. Share and enjoy!

Pork Chop Suey Recipe

Want to start your own blog?

We can help. Click this link to view the tutorial on How to Create a Food Blog .

The post Pork Chop Suey Recipe appeared first on Panlasang Pinoy.

Roasted Pumpkin Seeds

$
0
0

Roasted Pumpkin Seeds make a great snack; it can also be added to vegetable salad to make the texture better. I usually have roasted pumpkin seeds if I am not doing anything. Taking the seeds out of the outer shell before being able to enjoy the it is a good way to ease boredom.

roasted pumpkin seeds

Some of us carve pumpkins for Halloween for aesthetic purposes. Now, we all have an idea on how to make use of the seeds. Instead of just throwing it away, we can roast it to make roasted pumpkin seeds. Next time you make your pumpkin pie or even your sautéed kalabasa, try to save the seeds because we can always put it into good use.

After reading the recipe below, you will realize how easy it is to prepare roasted pumpkin seeds. I use a bit of oil to help roast the seeds better. You can put more oil than what is indicated in the recipe. I chose to add just a little bit of oil because I do not want my pumpkin seeds to be greasy. In fact, I rub the seeds in a paper towel after roasting so that the excess oil will be absorbed.

Try this simple Roasted Pumpkin Seeds recipe. Let me know what you think.

Roasted Pumpkin Seeds
 
Author: 
Nutrition Information
  • Serves: 2
  • Serving size: 2
Prep time: 
Cook time: 
Total time: 
Ingredients
  • 1 cup raw pumpkin or kalabasa squash seeds
  • 1 teaspoon canola or vegetable oil
  • ½ teaspoon sea salt
Instructions
  1. Preheat the oven to 400F.
  2. Meanwhile, combine the pumpkin seeds, oil, and salt in a bowl. Toss
  3. Prepare a baking tray and line it with an aluminum foil.
  4. Spread the pumpkin seeds over the foil.
  5. Put the tray in the oven and roast the pumpkin seeds for 7 to 12 minutes.
  6. Remove the tray and let the seeds cool down.
  7. Transfer to a serving bowl.Serve!
  8. Share and enjoy!


Want to start your own blog?

We can help. Click this link to view the tutorial on How to Create a Food Blog .

The post Roasted Pumpkin Seeds appeared first on Panlasang Pinoy.

Ensaladang Filipino Recipe

$
0
0

Ensaladang Filipino is a type of salad composed of eggplant, onion, and tomato. It has a simple vinaigrette dressing and is sometimes served with shrimp paste. Ensaladang Filipino is also known as ensaladang talong.

Ensaladang Filipino_

This simple salad recipe makes use of semi-grilled onion and tomato. The eggplants were also grilled longer to completely cook the inside. I used a simple vinaigretter composed of cane vinegar, sugar, salt, and ground black pepper.

Ensaladang Filipino on the Grill

Try this Ensaladang Filipino Recipe. Let me know what you think.

Ensaladang Filipino Recipe
 
Author: 
Nutrition Information
  • Serves: 2
  • Serving size: 2
    Prep time: 
    Cook time: 
    Total time: 
    Ingredients
    • 2 medium chinese eggplant
    • 1 medium plum tomato, sliced and half
    • 1 medium yellow onion, peeled and sliced in half
    • 1/2 cup cane or white vinegar
    • 1/4 teaspoon ground black pepper
    • 1/2 teaspoon sugar
    • 1/4 teaspoon salt
    • 1/4 cup shrimp paste
    Instructions
    1. Heat-up the grill. Grill the eggplant, onion, and tomato. The onion and tomato should only be grilled for 3 minutes per side, while the eggplant should be grilled longer until the inner part is fully cooked and soft. This should take around 10 to 12 minutes per side or more.
    2. Once the eggplant, tomato, and onion are done, peel the skin from the eggplant and slice. Slice the tomato and onion, as well. Arrange in a serving plate.
    3. Combine vinegar, sugar, salt, and ground black pepper in a bowl. Stir. Make sure that the salt and sugar dissolves completely. Pour over the tomato, eggplant, and onion.
    4. Serve with shrimp paste on the side.
    5. Share and enjoy


    Ensaladang Filipino Recipe

    Want to start your own blog?

    We can help. Click this link to view the tutorial on How to Create a Food Blog .

    The post Ensaladang Filipino Recipe appeared first on Panlasang Pinoy.

    Laing with Shrimp Recipe

    $
    0
    0

    Laing with Shrimp is not your typical laing recipe because it makes use of shrimp as an additional ingredient. It might have been common to use shrimp and other seafood ingredients in some version of laing, but the original laing version rarely use shrimp.

    Laing with Shrimp Recipe

    I have been experimenting with many versions of laing this past few years, and I can say that nothing beats the original version because it is simple and straight forward. However, we need to keep pace with the rest of the world and understand that each of us has a different preference when it comes to food. This laing with shrimp recipe does not intend replace the original version (which I really like). Instead, consider this as an additional option that you can enjoy along with the previous versions that I have shared.

    Aside from using shrimp, you can also try using crawfish. You can also do lobster (only if you are from the East coast or if you can get lobster at a reasonable price). I understand that most of us are busy (In fact, I was cooking this while trying to do my pending office tasks at home), so we should lean mostly on readily available ingredients, for convenience. I used ready-to-eat bottled shrimp paste (bagoong). You can purchase your favorite brand. I also made use of coconut milk in can and Sriracha sauce. The shrimp, on the other hand, were frozen for 3 days. I got them  from the Filipino store. I was there not to shop for food, but to buy the pink liquid that they use for manicure/pedicure. I cannot complain because the command came from a higher authority (it’s from my wife). I don’t want to go home empty handed, so I grabbed the frozen shrimp and a pack of dried taro leaves. Good thing I still have around 10 cans of coconut milk in the pantry.

    Laing with Shrimp-2

    Try this Laing with Shrimp Recipe. Let me know what you think.

    Laing with Shrimp Recipe
     
    Author: 
    Nutrition Information
    • Serves: 8
    • Serving size: 8
      Prep time: 
      Cook time: 
      Total time: 
      Ingredients
      • 1 lb. shrimp
      • 1/4 lb. sliced pork (optional)
      • 1 pack (3.5 oz) dried taro leaves
      • 4 cans (8 cups) coconut milk
      • 1/2 cup shrimp paste (bagoong)
      • 1 tablespoons red chili flakes or 1 tablespoon Sriracha sauce
      • 1 medium yellow onion, sliced
      • ½ cup sliced ginger
      • 8 to 10 cloves crushed garlic
      Instructions
      1. In a large cooking pot, combine the 8 cups coconut milk, pork, onion, shrimp paste, ginger, and garlic. Turn the heat on and then place the cooking pot over the stove and start to boil the mixture.
      2. Once you see that the coconut milk starts to boil, gently stir. Let it boil completely and cover. Simmer (cook near boiling temp) for 18 minutes.
      3. Add the dried taro leaves (gabi leaves). Let it stay for 10 to 12 minutes in low to medium heat. Do not stir, but you can try to push the taro leaves so that it gets coated with coconut milk.
      4. After 15 minutes or when the leaves absorbed the coconut milk, you can start to stir the mixture. Cook for 8 to 10 minutes.
      5. Add the chili flakes (or Sriracha sauce) and shrimp. Stir and cook for 8 to 10 minutes. Transfer to a serving plate. Serve. Share and enjoy!


      Laing with Shrimp

      Want to start your own blog?

      We can help. Click this link to view the tutorial on How to Create a Food Blog .

      The post Laing with Shrimp Recipe appeared first on Panlasang Pinoy.

      Sweet Pepper Relyeno Recipe

      $
      0
      0

      Sweet Pepper Relyeno or Stuffed Sweet Peppers is an appetizer or main dish consisting of mini sweet peppers and ground pork. The ground pork was combined with spices and seasonings (which is somewhat similar to the mix in Lumpiang Shanghai), topped over the sweet pepper, pan-fried, and finished-up by baking.

      Sweet Pepper Relyeno


      Please do not confuse this with Stuffed Mussels. Both look the same because the peppers have the same shape as the shells. I like this dish because of the nice overall blend of flavors. The pork tasted really good, while having it with sweet peppers made it even better. You might want to have this with ketchup, but I think that having this dish without any condiment will suffice.

      Try this Sweet Pepper Relyeno Recipe. Let me know what you think.

      Sweet Pepper Relyeno Recipe
       
      Author: 
      Nutrition Information
      • Serves: 6
      • Serving size: 6
        Prep time: 
        Cook time: 
        Total time: 
        Ingredients
        • 10 pieces sweet peppers, sliced into half lengthwise and seeds removed
        • 1 lb. ground pork
        • 1/2 cup plain breadcrumbs
        • 3 pieces eggs
        • 3/4 cup Panko breadcrumbs
        • 1 medium yellow onion, minced
        • 1/2 cup minced carrot
        • 1 teaspoon garlic powder
        • Salt and ground black pepper to taste
        • 1/4 cup cooking oil
        Instructions
        1. Prepare the stuffing by combining the ground pork, 1 piece egg, minced onion and carrot, salt, ground black pepper, and garlic powder in a bowl. Mix well.
        2. Scoop around 1 1/2 tablespoons (or more) of the mixture and arrange it over the sliced sweet pepper. Gently press the mixture to keep it intact.
        3. Meanwhile, heat the cooking oil in a pan.
        4. While the oil is heating, beat the remaining 2 eggs. Dip the sweet pepper with ground pork in the egg and roll it over the Panko bread crumbs. Make sure that the top is fully coated with the bread crumbs.
        5. Pan fry the sweet pepper with breadcrumbs in medium heat until the breadcrumbs turns light to medium brown. Turn it over and cook the other side (side without the stuffing) for 2 minutes. Remove from the pan. Arrange in a baking tray lined with Aluminum foil.
        6. Preheat the oven to 350F.
        7. Bake the pan fried sweet peppers for 25 minutes.
        8. Remove from the oven. Arrange in a plate lined with paper towels.
        9. Serve with ketchup. Share and enjoy!


        Sweet Pepper Relyeno Recipe

        Want to start your own blog?

        We can help. Click this link to view the tutorial on How to Create a Food Blog .

        The post Sweet Pepper Relyeno Recipe appeared first on Panlasang Pinoy.

        Viewing all 40 articles
        Browse latest View live